


 Sorry for my absence the past few days...Had a family emergency!...
 My 20TH Week "Down That Road Again" saw another .5 pond lost...Better than nothing I say...
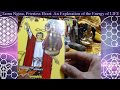
Faux Stained Glass Window
 Use these instructions to make a beautiful stained glass window decoration -
Materials Needed:
Old window frame with glass intact
Sand paper
Window cleaner
Simple drawings to fill the panes. (coloring books)
A bottle of Liquid Lead (#16076)
Stained glass paint. The paints needed for this project are Gallery Glass® Window Color™, a paint developed specifically for use on glass surfaces to create faux stained glass.
Paint brushes
Instructions:
Sand frame to remove any loose paint.
Clean the window panes.
Sketch your drawing, coloring books make great sources for your stained glass pictures (spring flowers, animals...) on a piece paper to fill the pane. Tape it to the back of the window, right side to the glass.
Following the drawing, make an outline with the Liquid Leading. Simple drawings are best.
If it’s a new bottle of Liquid Lead, remove the tip from the bottle, take out the paper seal, and replace the tip. Holding the bottle upside down, tap it firmly on the table top or other hard surface to get the lead to flow into the tip of the bottle. If you find the tip isn’t producing a decent line, make a tape tip for it. Periodically holding the bottle upside down and tapping it on the table while you’re working with it helps to reduce the air trapped inside and keep the lead from ‘spitting’ out the bottle.
The key to painting successfully with Liquid Lead is to keep the bottle tip away from the surface while you gently squeeze out the paint, not scrape the tip along the surface. Hold the bottle close to the bottom (flat end) of the bottle. Squeeze to start the flow of Liquid Lead, lightly touch the surface with the Liquid Lead at the start of a line of the printed design, then lift the bottle tip up at least half an inch off the surface and, while lightly applying pressure to the bottle, move your arm freely along each line of the design. Do not rest your arm or hand on the table as it will hinder the free movement needed to paint the Liquid Lead.
When leading dries, paint inside all the lines with glass paint. .Now that you’ve finished the leading and it’s dried completely, you’re going to fill in each section with your glass paint. Don’t use too much paint -- you want to avoid having paint flow over the leading into another section. It’s far easier to add more paint than to remove excess paint.
Bottle of paint don't have a paper seal like Liquid Lead, they're ready to use straight away. Holding the bottle upside down, tap it firmly on the table top or other hard surface to get the paint to flow into the tip of the bottle. Now you’re ready to paint with that color.
Work from the center of the project out to help keep your hands and fingers out of wet paint. Turn the project as needed to work on each section.
Start by running the tip of the bottle along the edge of the leading; this helps eliminate any ‘light holes’ without paint. Fill in each section with the color listed on the design. Unlike with Liquid Lead, the tip of a paint bottle should touch the surface as you use it
Work systematically, adding your colors in a section before moving onto the next one. Start with the color adjacent to the 'lead' edge, and work inwards.
Use a cotton swab to clean up or remove unwanted paint from the surface if necessary. Get into the habit of wiping the tips of the paint bottles with a piece of paper towel regularly. This helps prevent unwanted drips, or contamination of the color.
Leave the project to dry for eight to 12 hours, or until all painted areas are transparent and clear of milky shadows. Be careful where you put the project while it dries, as you don’t want anything to touch the surface or dust to blow onto it. Do not allow paper, fabric or other such materials to touch or cover the painted surface before it is totally dry as it’ll mess up the paint.
 This is not only a great way to decorate a dull panel of glass, but it can cover chips, small cracks, discoloration and other problems to renew an old glass surface.
My breakfast for the week!
I mix together:
1 cup plain nonfat yogurt
1/2 cup blueberries
1/4 rounded cup Grape Nuts cereal
1/8 cup chopped walnuts
Yummy Good!!!!
Ten Tips for Better Brownies
 1.Always use the finest ingredients when making brownies; sweet butter, premiere chocolate and homemade vanilla extract if possible.
2.Homemade baking powder is a must along with soft wheat flour .
3.Make sure your nuts are fresh, and toast them lightly for better flavor.
4.When testing for doneness the center will seem a touch underdone. This is the time to take them out of the oven if the sides are done as they will continue to bake in the pan while cooling.
5.The last five minutes or so watch them carefully as even a minute or two can make the difference between a moist or dry brownie.
6.Nuts make the batter lighter, if omitting them the brownie will be more dense and you will need to adjust the baking time.
7.Melt the butter adding the sugar till dissolved makes for a moister brownie.
8.When mixing the chocolate with the batter if a small portion of the chocolate isn’t melted don’t worry as it will give you pockets of creamy chocolate in between bites.
9.A thick batter will give you moist fudge like brownie, where as a thin batter yields a more cake like brownie.
10.Brownies will firm up upon cooling so do consider this when taking them out of the oven.
Texas Pecan Brownies
 1 cup unsalted butter
2 cups sugar
1 1/2 cups all-purpose flour
1 1/4 cups dutch cocoa powder
1 1/2 teaspoons homemade baking powder
1 teaspoon fine sea salt
4 large eggs, room temperature
1 tablespoon homemade vanilla extract
12 ounces best-quality bittersweet chocolate, finely chopped
1 cup toasted pecan pieces
Preheat your oven to 350 degrees. Butter a 9×13 inch baking dish or pan with butter
n a saucepan, melt 1 cup of butter over medium heat; add the sugar and stir to dissolve. Keep mixture warm.
In a bowl, whisk together the flour, cocoa, baking powder and salt.
Add the butter mixture and stir to combine.
Add the eggs, vanilla extract, chocolate and the nuts.
Stir until the chocolate is almost all melted and the ingredients are combined. (This is a thick batter)
Spoon the batter into a prepared pan and spread the top to even the mixture in the pan.
Bake until set, 25 to 35 minutes.
emove to a rack to cool.
Cut into pieces and serve.
Store into an airtight container for up to 3 days. Frankly, they won’t last 3 days!


.jpg)


.jpg)


.JPG)


1 comment:
Yum! I wish I could reach into the computer screen and grab a brownie!
Post a Comment